Further experiments
The Baking Bread Experiment
Never pay hideous amounts of money for bread again. Just bake it
yourself. Here is my first experiment in bread baking. The goal is
to bake a loaf of six grain bread. The average cost for such a bread
in Ann Arbor is around $5 to $6 per loaf. It should be possible
to reduce the cost below one dollar.
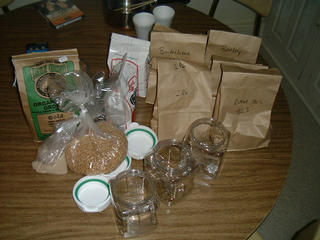
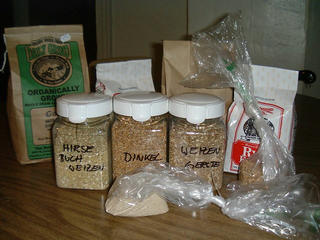
Ingredients for Six Grain Bread
- 250g Rye whole grain flour
- 750g wheat whole grain flour
- 1/2 - 3/4l warm water
- 60g sour dough
- 1 teaspoonful dry yeast
- 50g wheat berries
- 50g dinkel (spelt) berries
- 50g barley berries
- 50g millet berries
- 50g buckwheat berries
- 2 teaspoonful of salt
- 50g rolled oats
|
-
You can buy all the ingredients in Ann Arbor at the
People's Food Co-Op besides the
spelt berries which you can buy at Wholefoods.
The flour turns out to be more expensive than I thought it would be.
It is around one dollar per pound of organic flour. The grains tend
to be cheaper about $0.90 per pound. The total cost of a 1.5kg loaf including
all ingredients is about $2.40. The cost in relation to a commercial
bread is $1.20 per loaf.
|
Making Sour Dough Starter
The bread is based on sour dough. Sometimes it is possible to order
sour dour from a bakery, or you might find it in the refrigerated
section of a grocery store. However, in this case, I was not able to
find any sour dough and proceed with starting the sour dough from
scratch.
[Later, I learned that Carl's friends send starter to those who need it.]
I found the following recipes on the net and used them to
get some idea what other people are using for sour dough
starters.
The main problem seems to be to leave the sour dough
starter at a warm place in constant temperatures without
exposing it to any cold drafts.
The Encyclopedia Britannica has the following to add:
-
Lactobacilli have an important role in the manufacture of fermented
vegetables (pickles and sauerkraut), beverages (beer, wine, and
juices), sour dough breads, and some sausages. [...]
Rye bread, closer-grained and heavier than wheat bread, is aerated by
the use of a leaven (sourdough) rather than yeast. [...]
The sourdough method, used for rye breads, employs a small portion of
dough, or sponge, in which sugar-fermenting bacteria have been allowed
to develop. When added to a fresh dough mixture, the sponge produces
fermentation.
|
Sour Dough Starter
- 2 cups flour
- 2 cups warm water
- 1 package dry yeast
Make this starter only when you have forgotten to save a start, or
when you are making if for the first time. Combine ingredients and
mix well. Place in a warm place or closed cupboard overnight. In the
morning put 1/2 cup of the starter in a scalded pint jar with a tight
lid and store in the refrigerator or a cool place for future use.
This is sour dough starter. The remaining batter can be used
immediately for pancakes, waffles,muffins, bread or cake. To use the
starter again, (from now on this next step is called setting the
sponge)place remaining batter in a medium-size mixing bowl. Add
2c. milk and 2cups flour. Beat well and set in a warm place to
develop overnight. In the morning the batter will have gained 1/2
again its bulk and be covered with air bubbles. It will have a
pleasant yeasty odor. Now, set aside 1/2 cup of sponge in the
refrigerator jar for your sour dough starter for next time.
Source
|
|
Sour Dough Starter
- 1 package active dry yeast
- 3 cups warm water (105 to 115 deg)
- 3 1/2 cups unbleached or all-purpose flour*
Dissolve yeast in warm water in large glass mixing bowl. Gradually
stir in flour. Beat until smooth. Cover with towel or cheesecloth;
let stand in warm, draft-free place (80 to 85 deg) until starter
begins to ferment, about 24hrs (bubbles will appear on surface of
starter). If starter has not begun fermentation after 24 hrs, discard
and begin again. If fermentation has begun, stir well; cover tightly
with plastic wrap and return to warm place. Let stand until foamy, 2
to 3 days. When starter has become foamy, stir well; pour into 2
quart crock or glass jar with tight-fitting cover. Store in
refrigerator. When a clear liquid has risen to top, starter is ready
to use. Stir before using. Starter can be stored for several weeks.
If it is not used regularly every week, add 1 teaspoon sugar and stir
well. If used regularly starter will be active indefinitely.
Source
|
I ended up using the following recipe for my first attempt
at creating a sour dough starter. I have a feeling that
adding sugar might be considered cheating by some people,
but I thought that I might need the additional advantage.
Sour Dough Starter
- 1 package active dry yeast
- 2 cups warm water
- 2 cups whole rye flour
- 1/2 cup milk
- 1 teaspoonful sugar
Add milk to the warm water, dissolve sugar and yeast, and slowly
stir in the flour until the result looks very smooth. Place
the bowl on the top of a shelf covered with a towel. The
temperature needs to be above 22oC.
|
-

|
During the evening I had to deal with a little sour dough
explosion. Even though I had left double space in the
container, the sour dough was raising too fast. I hope
that is not a bad sign. As a result, however, it had to be moved
into a large bowl.
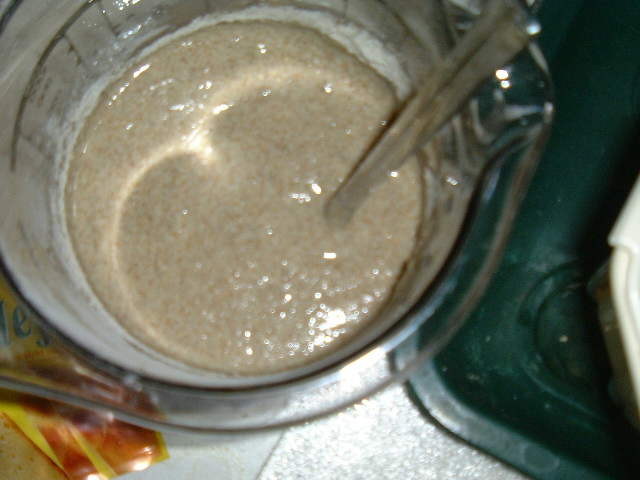
Sour Dough Starter: After one day
After the night, the sour dough has nicely risen. There are many
bubbles on top of it. My original plan was to use spring water
when I was going to feed it. However, after heating up the spring
water I noticed that it was carbonated. Now, I just hope that
the Ann Arbor tap water does not contain too much chlorine. On
the other hand, I used tap water yesterday and it seemed to be fine.
I feed the sour dough starter with one cup of warm water and
one cup of whole rye flour. I stir everything until the
sour dough starter is smooth again. Look at the pictures on the right.
You should stir the starter two or three times a day so that it
does not dry out on top.
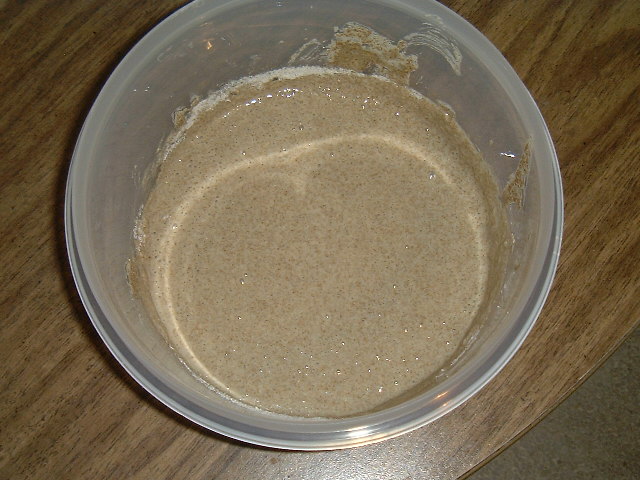
Sour Dough Starter: Third day
I add another cup of warm water and gently stir in another cup
of whole rye flour. Stir until the sour dough is smooth.
Sour Dough Starter: Fourth day
Liquid has formed on top of the sour dough.
I add half a cup of warm water and gently stir in another cup
of whole rye flour.
The sour dough is ready for the bread in the evening.
|
-
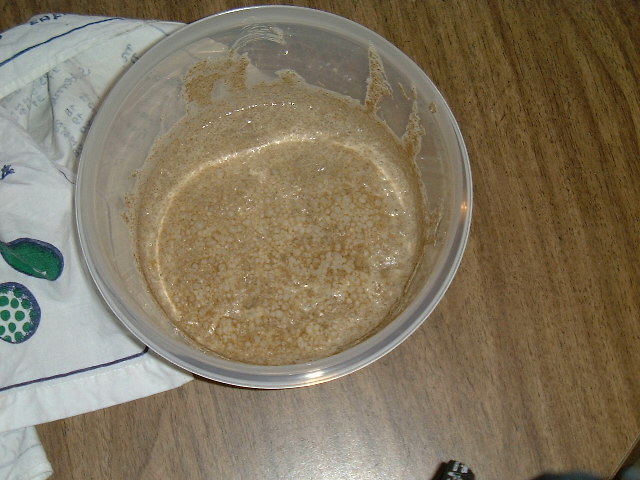
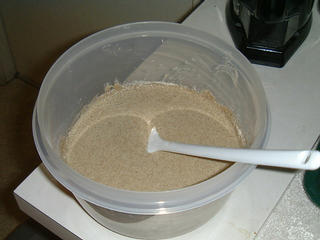
On the left, you see the bubbles on the top of the starter. They appear
after a night of raising. The right image shows the sour dough starter
after it has been fed.
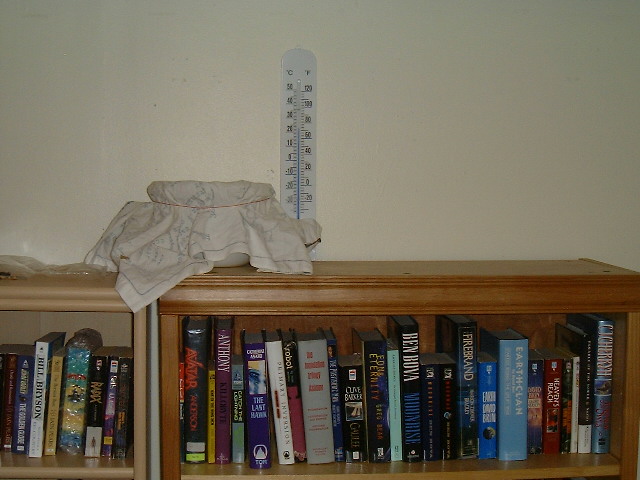
I let the sour dough ferment on the top of my bookshelves. The thermometer
shows a temperature close to 23oC. The image on the right shows
the sour dough after the second feeding on the third day. I hope to use to
for baking bread tomorrow.
|
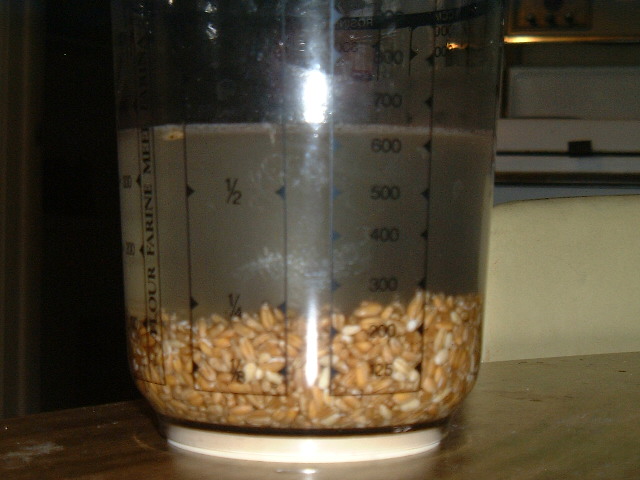
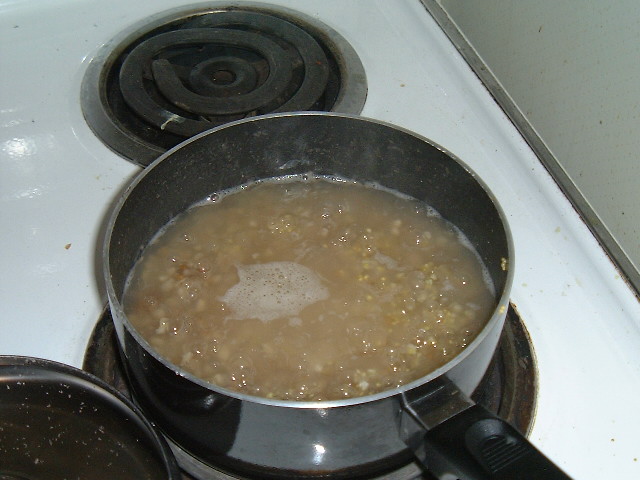
Preparing the Bread
The grain berries need to soak for a long time before they can be
boiled. I should probably boil all of them, but for now I will
only boil as much as I need for the first bread. Optimization
can wait until experience accompanies it.
Preparation
The wheat, barley and spelt berries need to soak for six
hours covered with water. The millet and the buckwheat require
only three hours of soaking.
Boil the wheat, barley and spelt at low heat for about an hour.
The millet and buckwheat need to boil only for 30 minutes on
low heat.
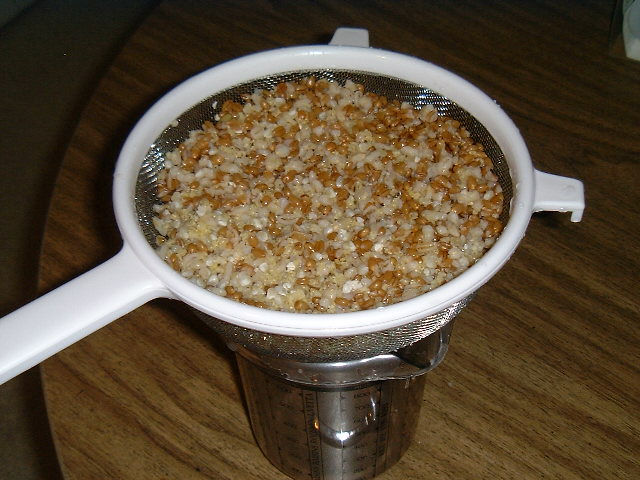
Drain them through a sieve, let them dry and cool down.
To speed the drying and prevent mold from building on the grain,
you can spread the boiled grain on the bottom of a large container.
|
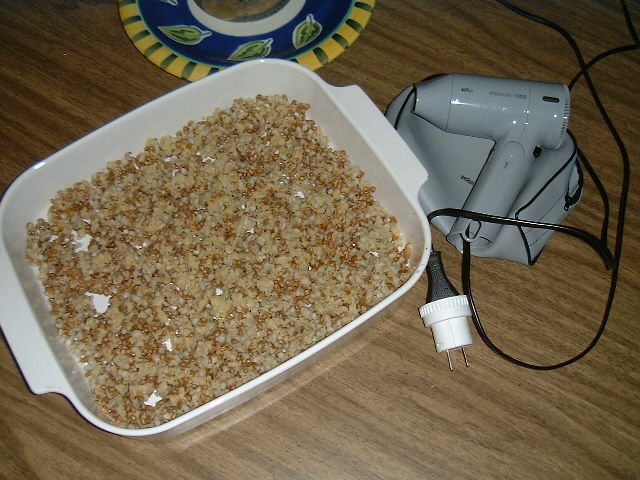
-
The millet and buckwheat look a bit strange and smell not as I would
expect. I hope that I got the right stuff. You can see all the grain
boiling in the right image.
|
|
|
-
The drippping was not too difficult, but it just would not dry in the
sieve. After a while I decided to be pro-active about the situation
and spread the boiled grain out in large oven form. To speed the drying,
I employed the help of a blow dryer.
|
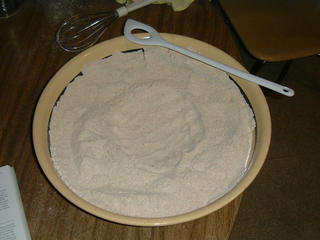
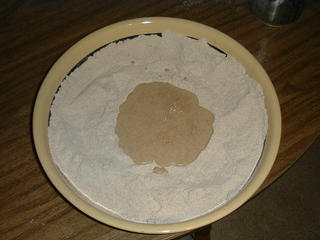
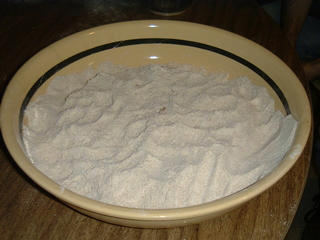
Pre-Dough
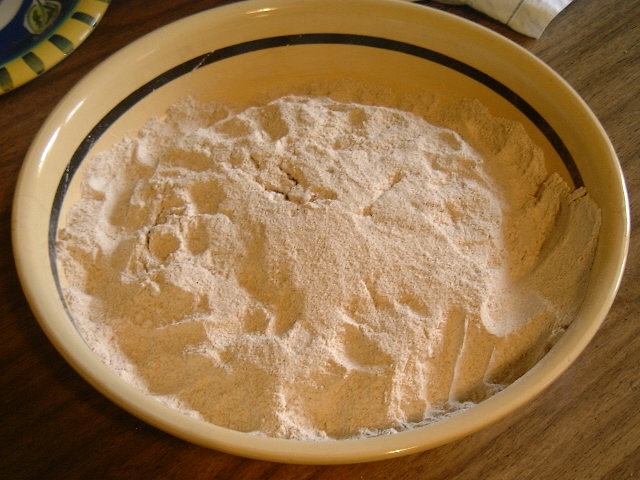
Mix the rye and the wheat flour in a big bowl. Then form
a hole in the middle of the flour.
Take 1/4l of warm water, mix it with the sour dough and the
yeast. Then pour it in the hole that you made in the flour.
Mix it with half of the flour and let it stand for twelve
hours in a warm place.
Research seems to indicate that the temperature might have
to be 24oC and above for this process.
|
-
After everything has been mixed together, I wonder
if I used enough water, and why I destroyed the
large version of the images with a broken shell script.
The image on the right shows the risten pre-dough.
|
|
|
-
|
There are so many things that need to be considered in order to create
a good crust. I hope that I have a brush to apply some water to the
bread. The traditional check for testing the doneness of the bread is
to thumb it on the bottom - wrap it towel. If it sounds hollow the
bread is done, otherwise put back into the oven immediately.
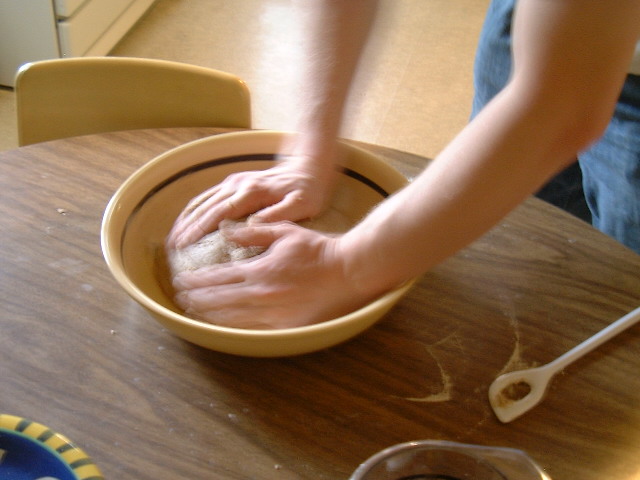
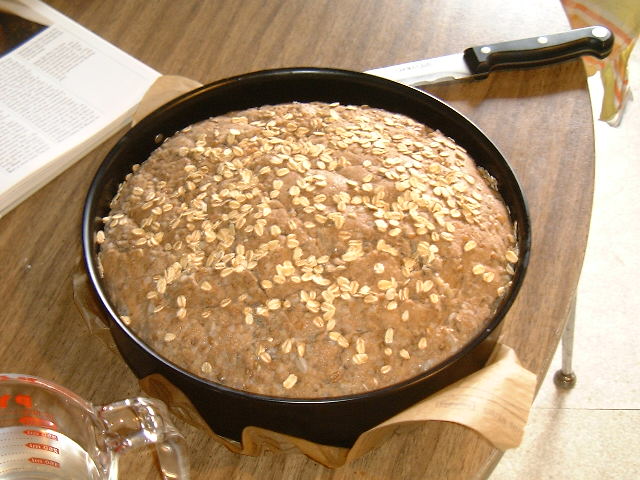
Makeing the Dough
Mix the pre-dough with the salt, the rest of the water and all the
flour. Knead it until the dough is firm.
Set aside one tablespoon of rolled oats; take the remaining oats
and all boiled grains and knead them into the dough.
Cover the bottom of a baking form with baking paper, and
let the dough raise in a warm place for two hours.
|
|
-
Knead the dough in and out, from the left to the right, on the top through
the bottom. Lupines really helped me with this, as his experience as
Argentinian Fred Astair is very pertinent to bread baking.
|
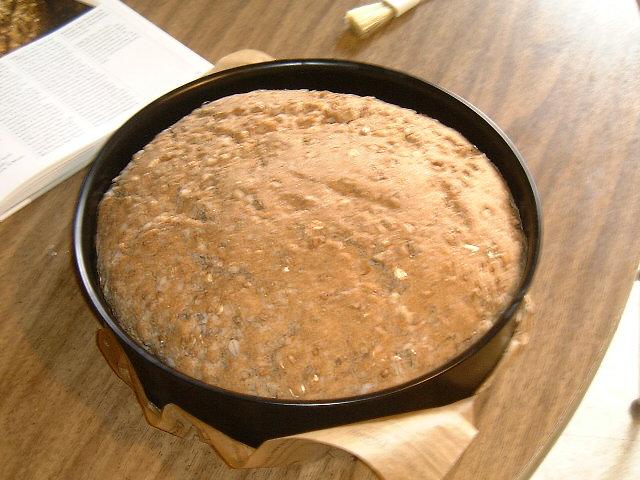
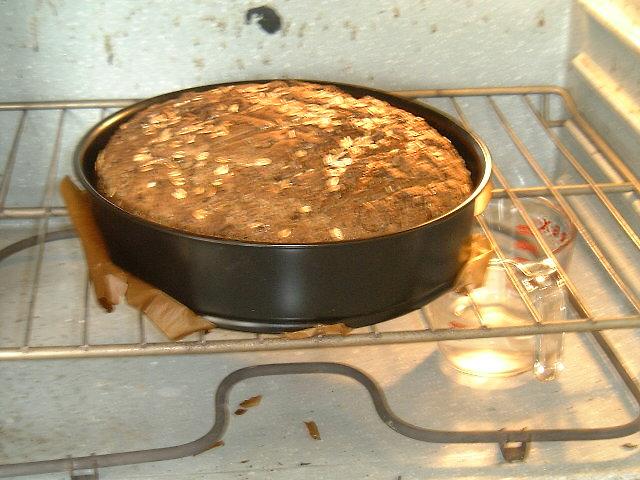
Baking the Dough
Preheat the oven to 220oC (428oF). Slash diamond
like shapes into the surface of the dough. Apply water to its surface
with a brush, and sprinkle the remaining oats on top of it.
Place a small bowl of water on the floor of the oven. In German,
this is called "Schwaben geben." Then place the
dough covered with baking paper on the lowest rung of the oven.
Bake for fourty minutes, then remove the paper and bake for fourty
more minutes.
|
-
The dough still looks nice. Unfourtunately, I live in an apartment
with a broken oven. It will not hold any temperature even though
I place a thermometer in it. I think the bread is dying.
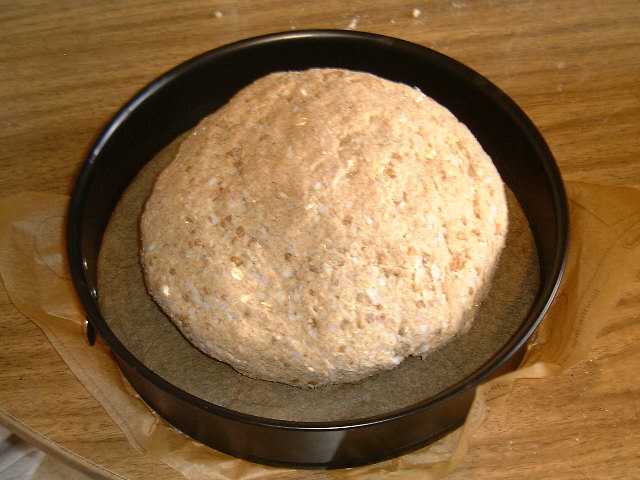
The image on the left shows the dough after two hours of raising. On the
right, you see it after I slashed it and sprinkled rolled oats on it.
|
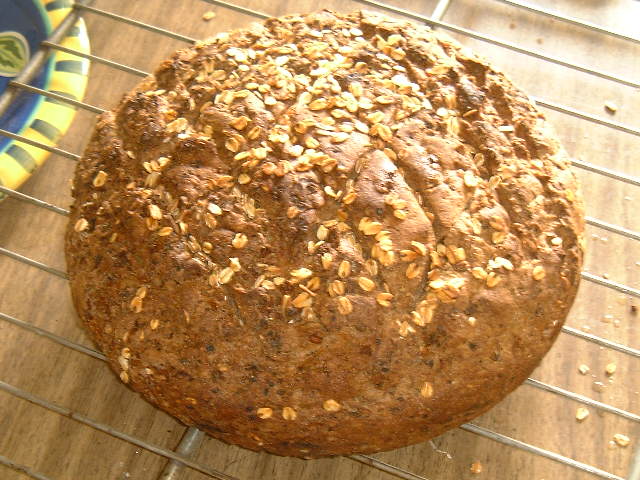
After Baking
Take the bread out of the form with a towel and thumb its back, if it sounds
hollow, the bread is done. Otherwise put the bread back into the oven
immediately and check again after a while.
To the keep the crust from getting too hard, apply a bit of cold water
to it with a brush. Then let the bread rest for eight more hours on
a rack.
Now you should have very nice bread for breakfast next morning.
|
-
The water filled glas bowl helps with getting the crust right.
It turned out that even though the oven was changing temperatures
like crazy that the bread did quite fine anyway.
The bread still needs to rest for a few hours to completely finish
the baking process. So, don't cut it too early.
|
This concludes my first bread baking experiment. The final test of course
is its taste in the morning. But I am very optimistic about it.
The bread tastes great. I am baking the next one now.
If you live in Ann Arbor, and would like to conduct your own bread
experiment, you can certainly get sour dough from me. Just send
an email.
If you are a bread baking expert, and have closed your eyes already
anticipating impending doom, feel free to send me your comments.
Links
Niels Provos
Last modified: Sat Apr 12 13:07:06 EDT 2003